
A Guide to Mastering ADAS Calibrations to OEM Procedures
Advanced Driver Assistance Systems (ADAS) represents a revolution in automotive technology. They include useful driver assistance and automation functionalities that include but are not limited to: Adaptive Cruise Control, Emergency Brake Assist, Highway Assist, Autonomous Obstacle Avoidance, Autonomous Parking and more.
In this Equipment Focus Article, we delve into the fundamental steps required for achieving precise ADAS calibration aligned to OEM procedures.
For independent garages and Bodyshops’, embracing ADAS isn't just about keeping pace with industry trends; it presents an opportunity to become a specialist in this field of expertise.
However, here's the catch: ADAS isn't a one-size-fits-all solution. It's not merely a matter of acquiring new equipment and forging ahead. ADAS demands specialised skills, necessitating training. Additionally, investing in the appropriate equipment that adheres to Original Equipment Manufacturer (OEM) procedures is essential for precise calibrations.
For those businesses willing to take on the challenge and have the resources and appropriate space to perform calibrations in-line with OEM procedures, ADAS represents a game-changer. It offers independent garages a chance to distinguish themselves from competitors and gain a competitive edge.

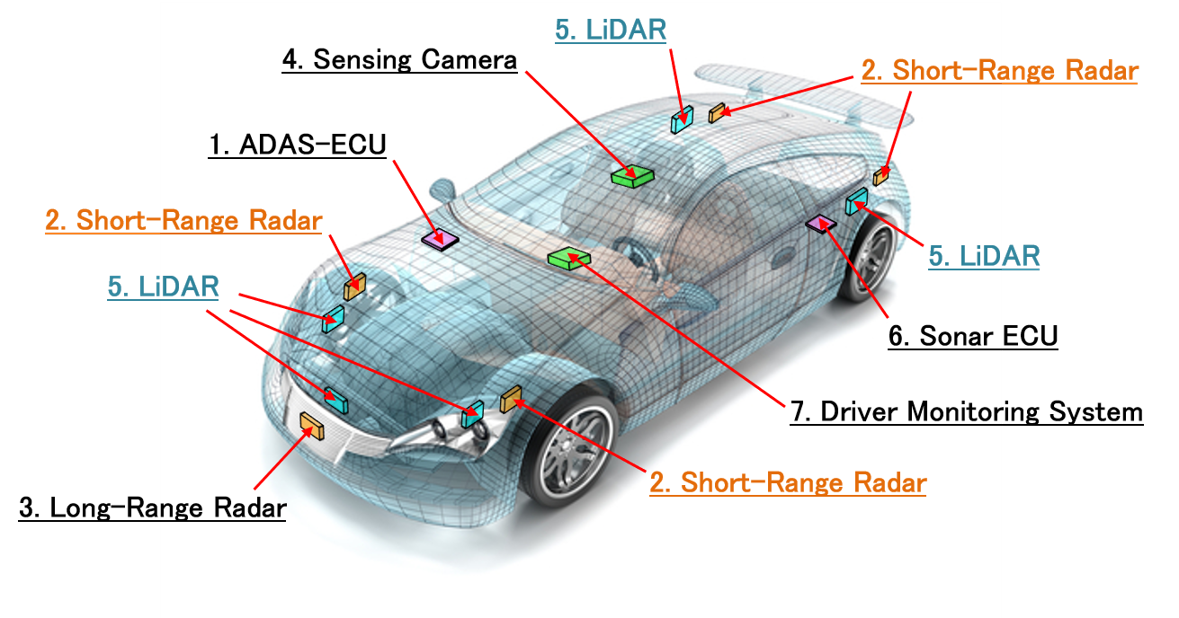
An Overview of ADAS Sensors:

The need for precise calibration
There are several situations why we need to calibrate ADAS systems, some of these include:
- After a collision and repair
- Bumper replacement
- Windscreen replacement
- Sensor/Camera replacement
- Suspension repair
- Tyre size changes
- After Wheel Alignment (The Thrust angle of the vehicle may have changed)
Why do we need calibrations?
Simply, a misaligned camera or sensor potentially will not detect an object correctly or may misinterpret its position relative to the vehicle.
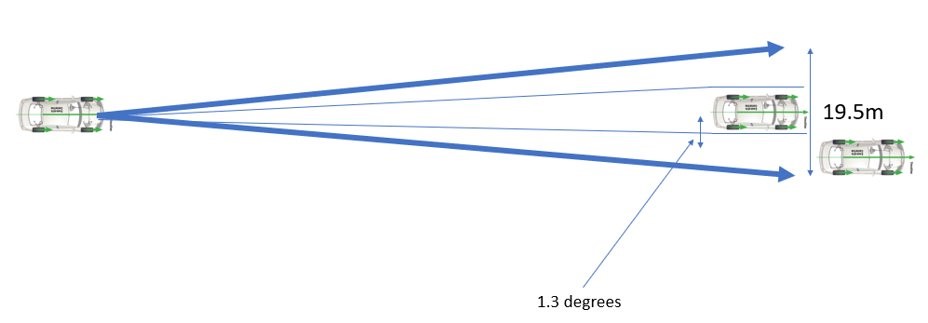
As an example, consider a scenario where a vehicle equipped with a front-facing camera with a 7-degree field of view spans a width of 19.5 meters over a 160-meter distance. A standard motorway lane is 3.65m wide, and when positioned 160 meters away from the vehicle, this translates to a deviation of 1.3 degrees, equivalent to roughly 2.2 millimeters on an adjustment screw or a bend in a bracket. Any inaccuracies in precise calibration over this distance notably impairs the camera's ability to function accurately and may lead to inaccurate detection of obstacles.
Steps for perfect calibration - What is important?
Performing a correct ADAS calibration is a lot more than just pushing a few buttons. Workshops have to take into consideration some important factors that are considered a must-have for an accurate procedure. The targets used for calibration must be positioned correctly to ensure accuracy so is essential to have the appropriate equipment that can truly make the job a straightforward process without requiring the intervention of the technician to carry out any manual procedure to reduce errors. Some environmental factors such as lighting, temperature, and humidity can affect ADAS calibration. Calibration should be performed in a controlled environment, away from any external factors that could affect the accuracy of the system.
Environment:
Workshop space: To perform Advanced Driver Assistance Systems (ADAS) calibration to OEM specifications, it's crucial to ensure adequate space around the vehicle. The exact space requirements can vary depending on the specific calibration process and the manufacturer's specifications.
However typically, a clear and open area is necessary to ensure accurate calibration without interference, you'll need enough room to accommodate the calibration equipment and allow for correct alignment and positioning of the vehicle, ensuring the workspace is free from obstructions like other vehicles, equipment, people or large objects that could inhibit the calibration process.
Floor Level
ADAS systems rely on precise measurements and angles to function correctly, and any deviation from the recommended specifications can result in an inaccurate calibration. If the floor is not level, the vehicle’s position and orientation can be affected, resulting in errors in the calibration process.
A level floor provides consistency in the calibration process. It ensures that the vehicle is in a stable position, which is essential for making accurate adjustments to the sensors and cameras.
Many vehicle manufacturers specify that ADAS calibration should be performed on a level surface to ensure compliance with their standards and warranties. Deviating from these requirements could void warranties or compromise the effectiveness of the ADAS feature due to errors in the calibration process.

Lighting
Good lighting in the calibration environment is essential for several reasons:
- Visibility: Adequate lighting ensures that technicians can see clearly during the calibration process. This is crucial for accurately positioning calibration targets, aligning cameras and sensors, and making precise adjustments. Poor lighting conditions can lead to errors and inaccuracies in calibration.
- Accuracy: Many ADAS features rely on visual inputs from cameras and sensors. Proper lighting helps ensure that these inputs are clear and reliable, allowing for accurate calibration of the systems. Without good lighting, there may be issues with detecting calibration targets or obtaining accurate measurements.
- Consistency: Consistent lighting conditions contribute to consistent calibration results. By ensuring uniform lighting across different calibration sessions, technicians can achieve more reliable and repeatable outcomes.
Space around the vehicle
It is vital to eliminate any potential distractions. This involves ensuring that other calibration boards aren't within the sight of vehicle cameras and sensors, and that windows in the workshop, visible to the sensors or cameras, are effectively blacked out.
These precautions prevent confusion during camera or sensor calibrations, reducing the likelihood of errors.
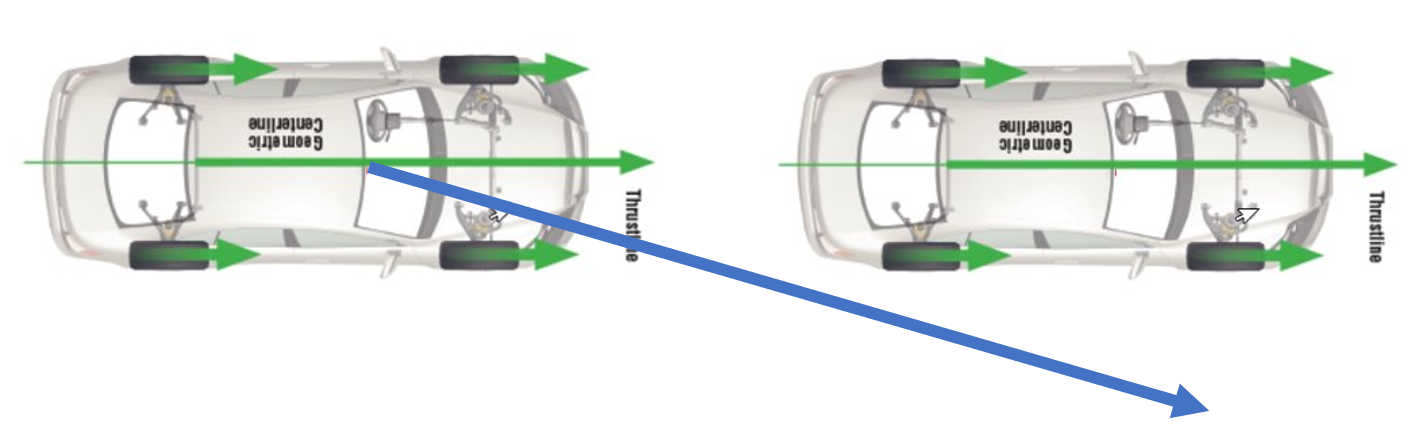
Centerline
It is critical to determine the true centerline of the vehicle, and additionally, it is also important to perform a wheel alignment procedure before ADAS calibration to ensure the trust angle of the vehicle is correct (especially if the vehicle was previously involved in a collision).


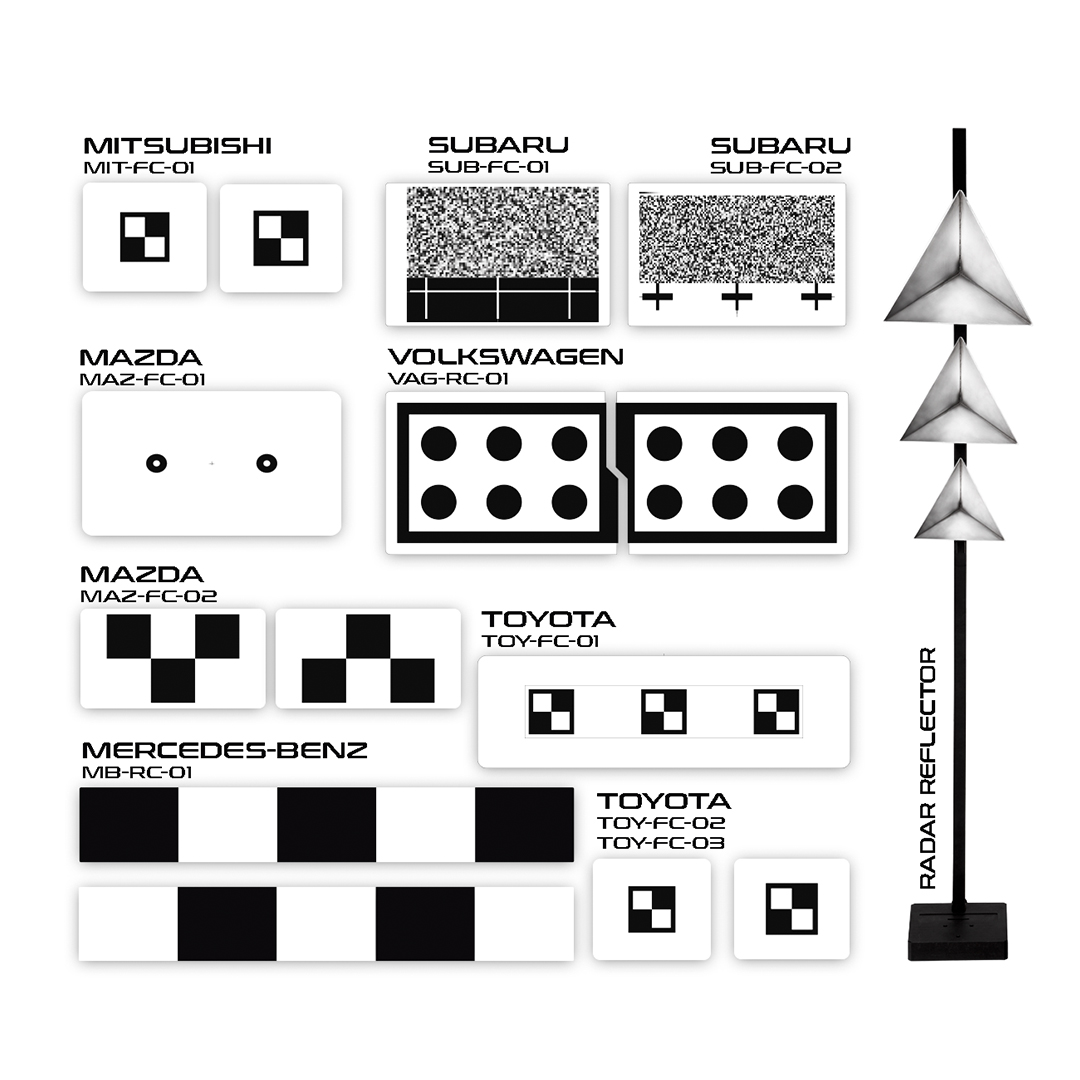
Targets
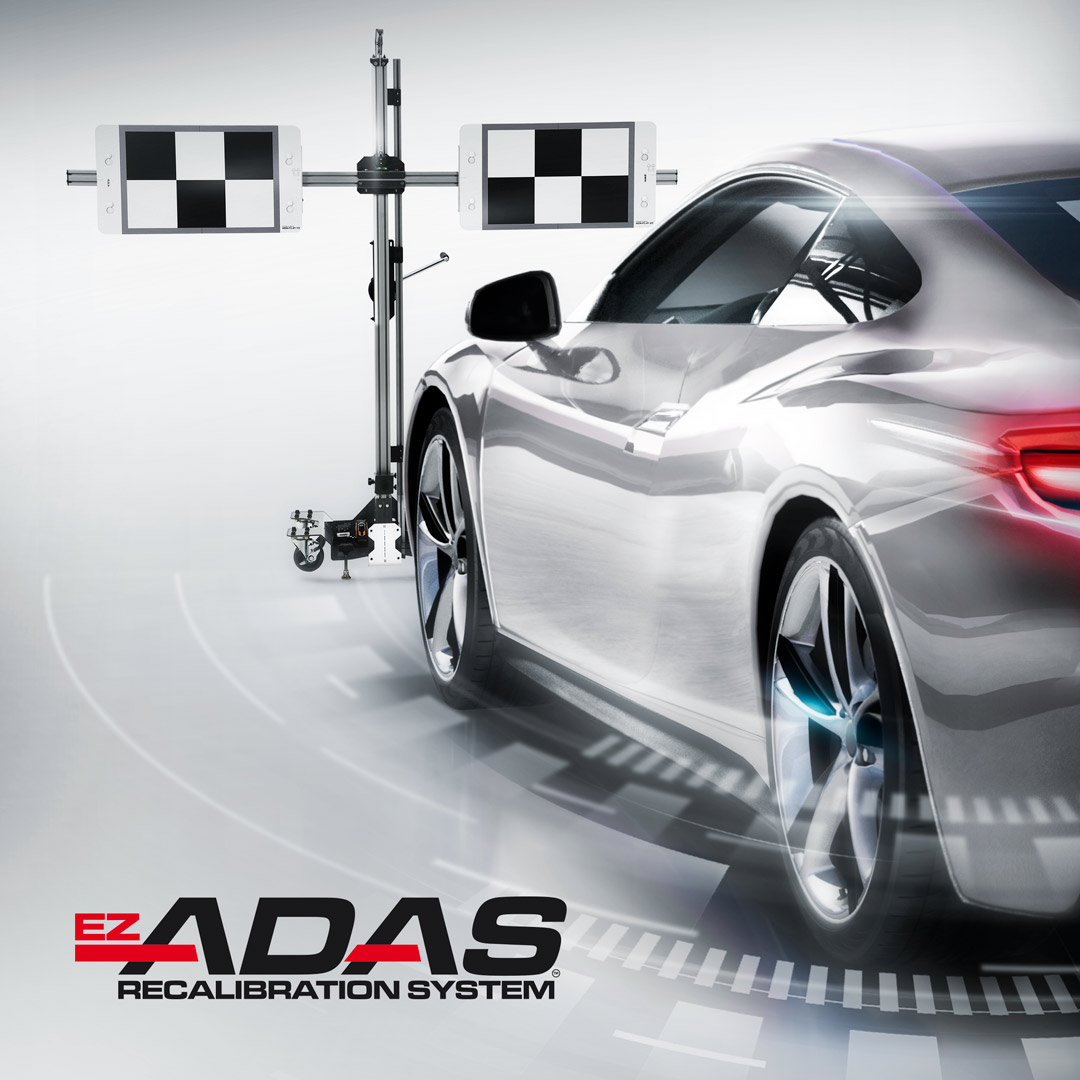
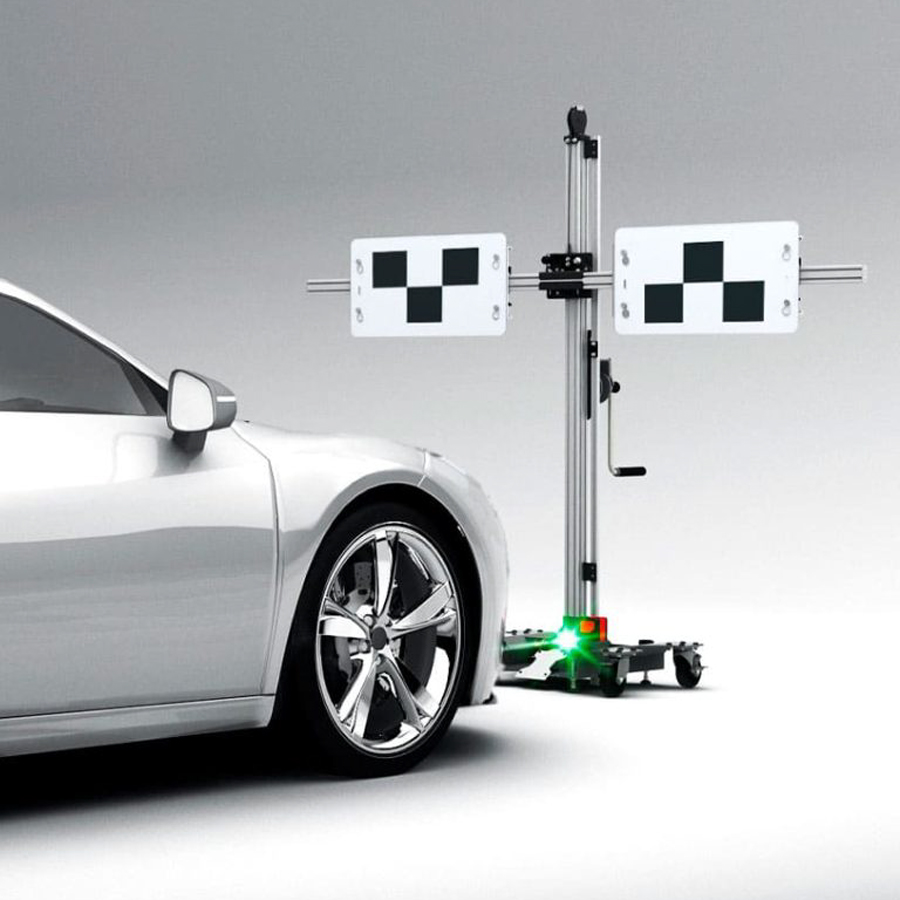
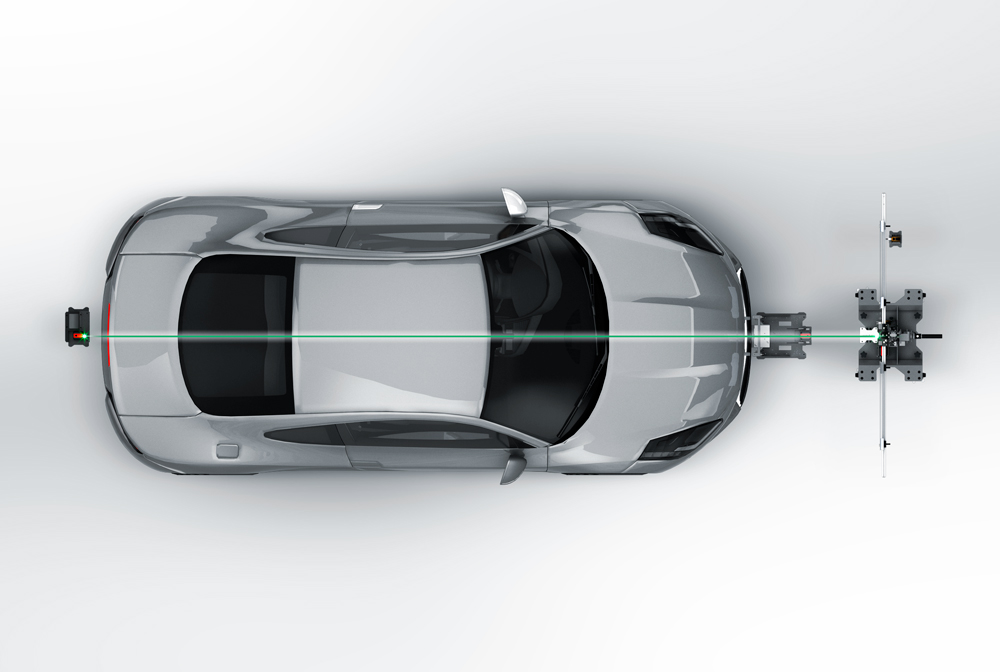
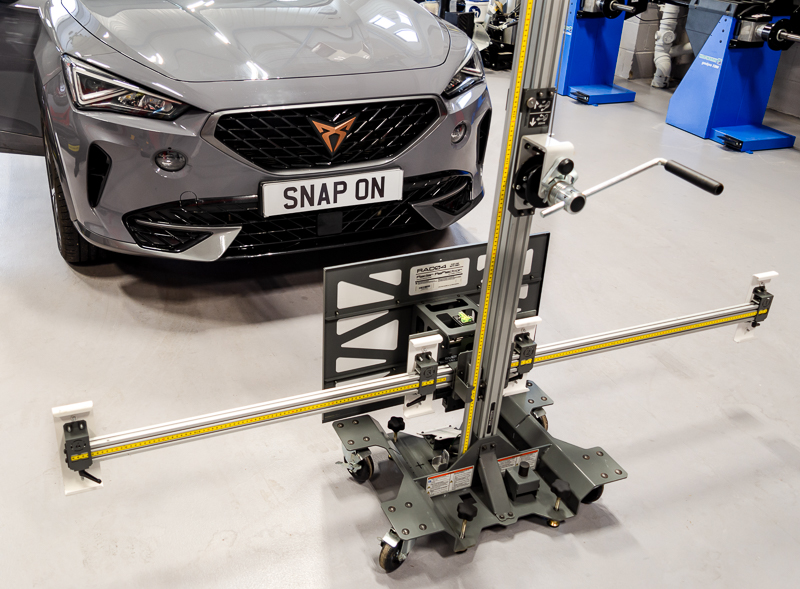
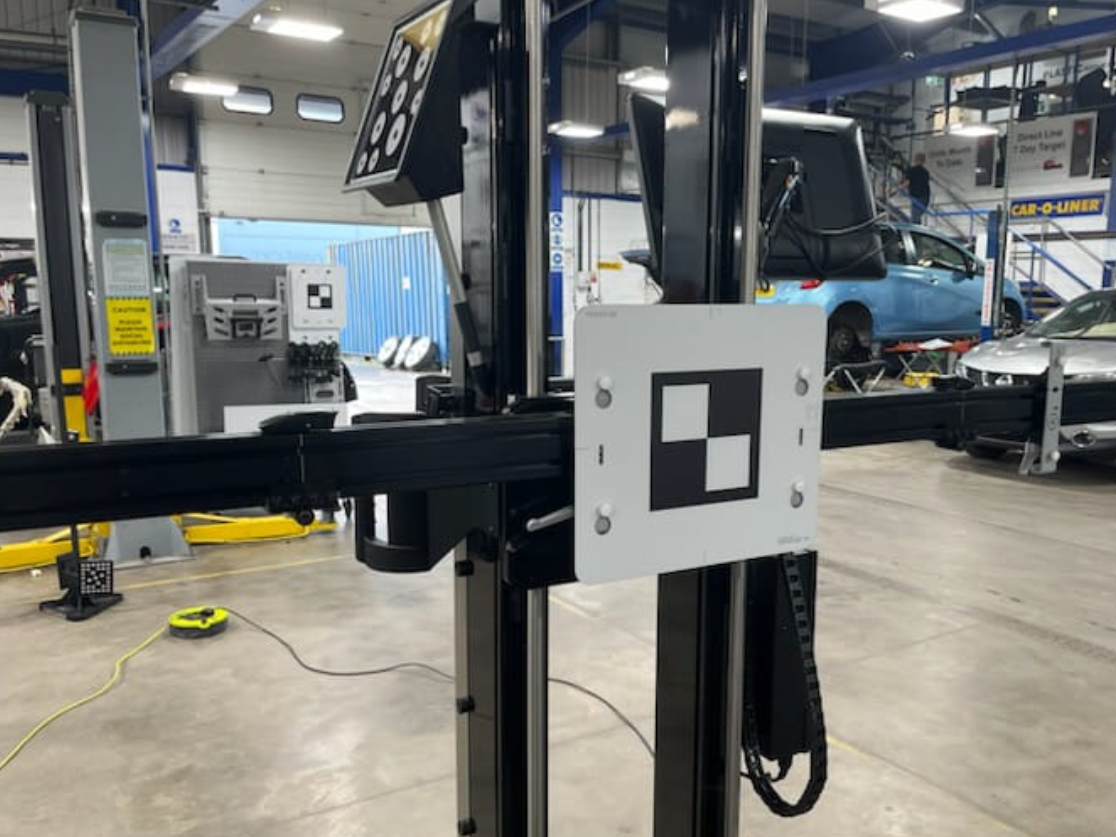
For static calibrations, ensure you are equipped with OEM-Specific ADAS calibration targets. These boards come in a wide range of sizes and have specific patterns and markers that allow the cameras and sensors to accurately detect and align themselves during calibration.
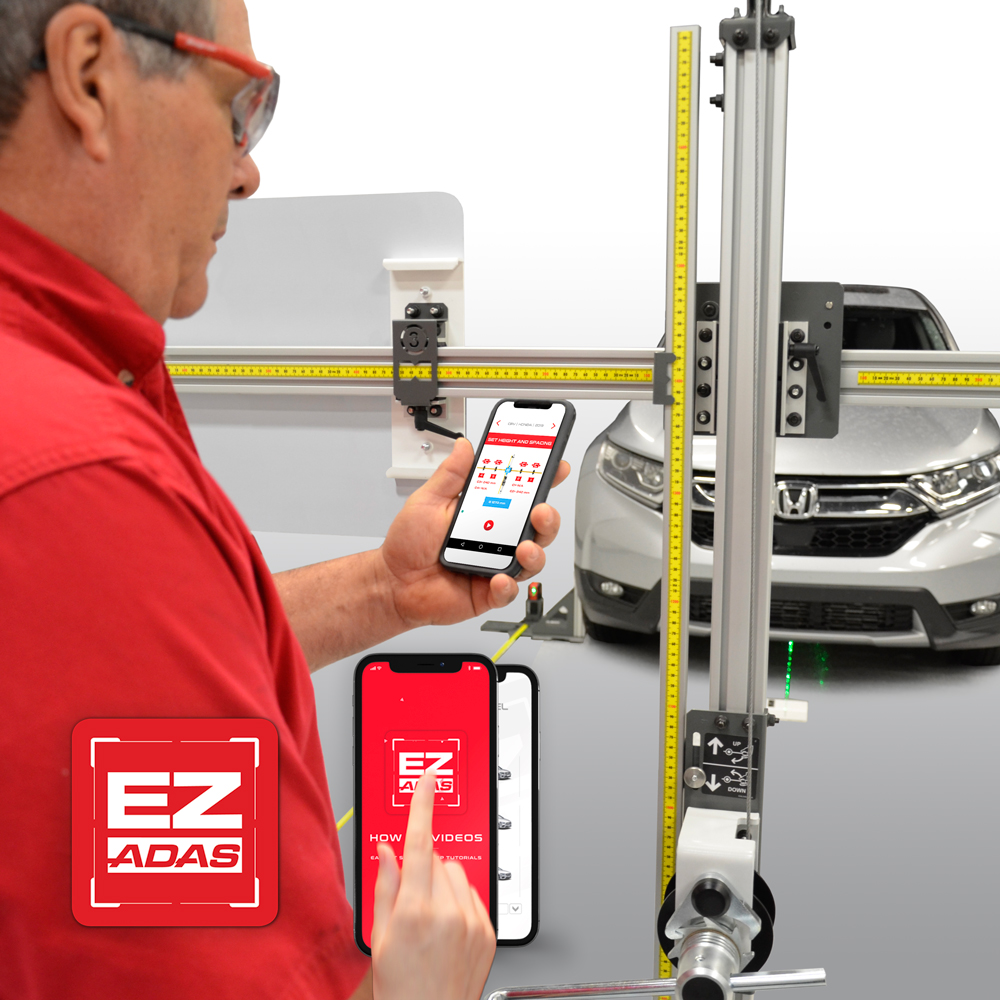
ADAS targets are generally specific by vehicle manufacture and a kit will consist of multiple targets specific to specific ADAS systems on the vehicle. Ensure these targets are positioned in line with OEM procedures (the SUN® EZ-ADAS App gives you complete resources to guide you through this process).
Vehicle:
Read the OEM Procedure
Reading the OEM procedures before ADAS calibration is crucial. It ensures accuracy, safety, warranty compliance, optimal system performance, and staying informed about updates and revisions in calibration processes.
The OEM procedure may also define checks to specific vehicle elements prior to calibration for example: Ensuring the windscreen and radar cover are clean before ADAS calibration is vital. A clean windscreen aids sensor visibility and calibration accuracy for visual sensors. Additionally, a clean radar cover ensures accurate radar sensor detection, calibration precision, and system reliability. Any dirt or debris can obstruct the sensors' vision, leading to inaccuracies in calibration.
The SUN® EZ-ADAS Mobile App will guide you through the entire process with easy instructional videos, and all the procedures required to perform a successful recalibration to OEM specifications.
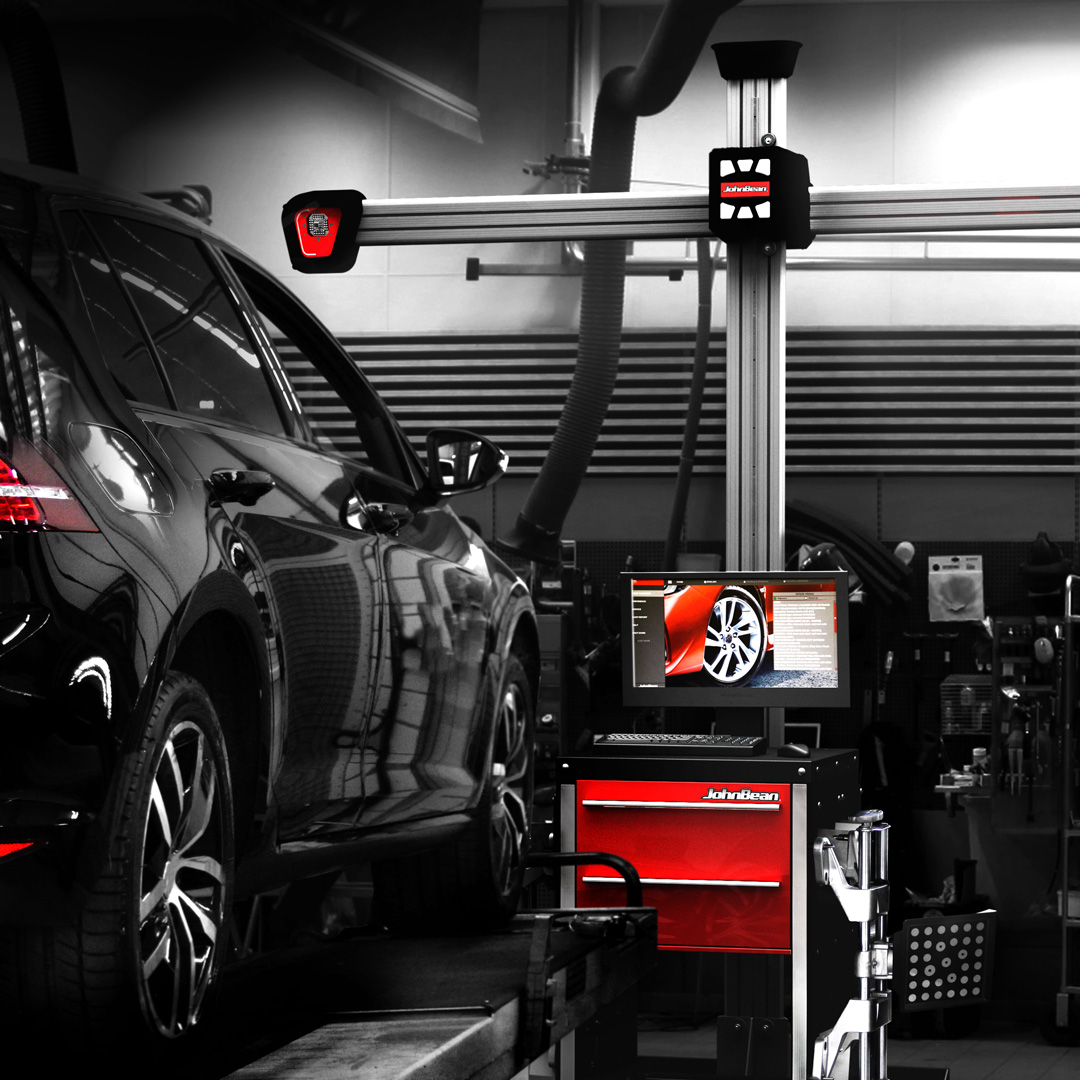
Wheel Alignment
Wheel alignment is vital for ADAS as it ensures accurate sensor alignment, precise measurements, correct target placement during calibration, optimal performance, and overall safety.
Cameras and sensors use different inputs from the vehicle to operate properly. Most OEMs require wheel alignment to be performed prior to ADAS calibration, as the thrust angle of the vehicle may have changed.
Ensuring that a wheel alignment procedure is performed prior to ADAS is critical to ensure ADAS system calibration is accurate.
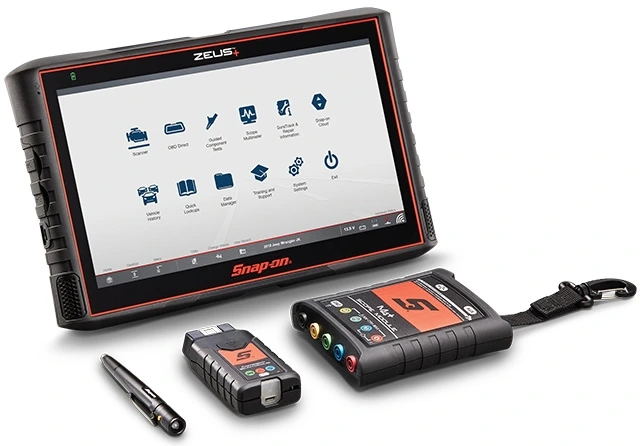
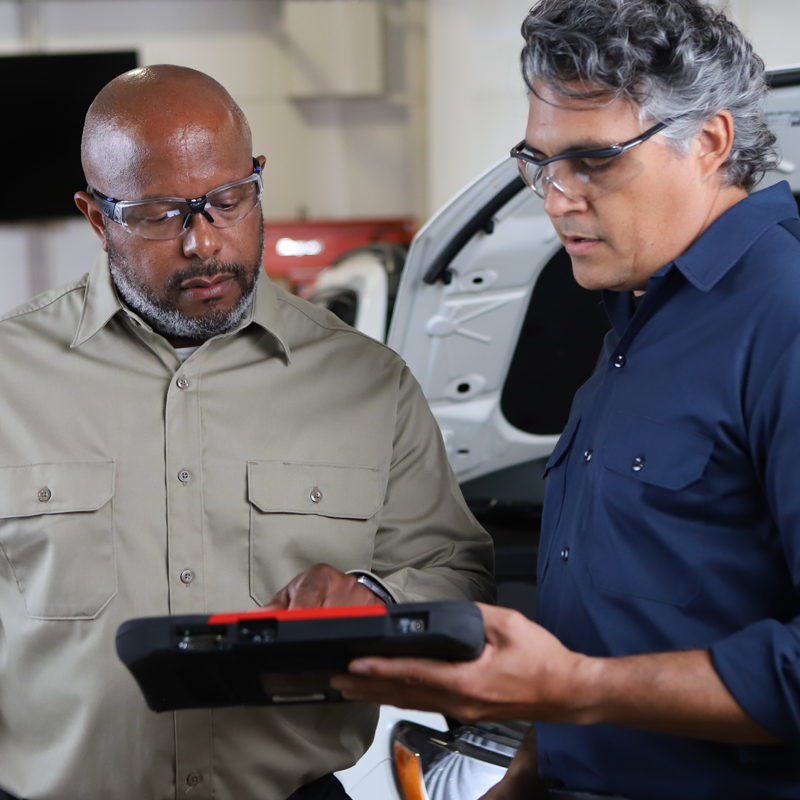
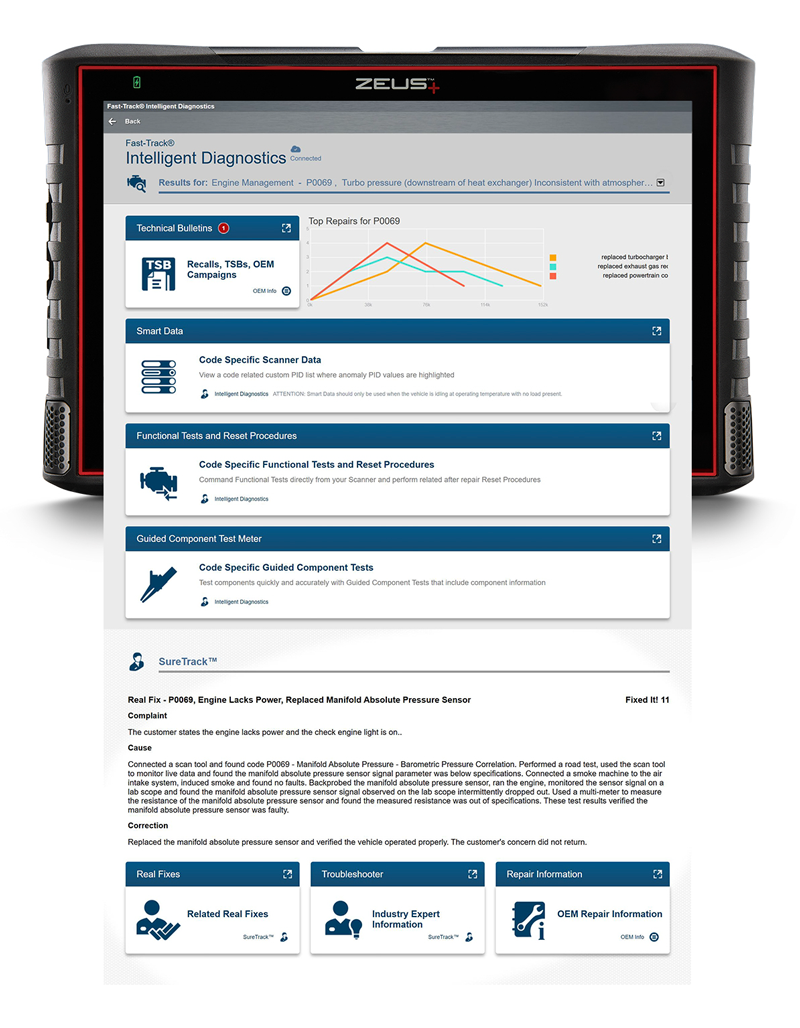
Diagnostic Scan Tool
A diagnostic scan tool is an essential tool to complete ADAS calibration procedures.
Snap-on® Diagnostic Scan Tools that support ADAS calibrations includes: SOLUS™, APOLLO™, TRITON™, and ZEUS™ series products running the latest Snap-on® Diagnostic Software.
The diagnostic scan tool you choose should feature extensive ADAS vehicle coverage to enable you to complete ADAS calibrations directly from the scan tool.
Snap-on® diagnostic scan tools are compatible with SUN® EZ ADAS™ Recalibration Systems.

Diagnostic Pre-Scan
Conducting a diagnostic pre-scan before completing an ADAS calibration is critical to identify any existing faults or issues within the vehicle's systems which could potentially affect the calibration process or the performance of ADAS systems.
Addressing these issues beforehand ensures that the calibration is done correctly and that the ADAS systems are functioning optimally.
Service and repair information
Referring to service and repair information is crucial for ADAS because any damage sustained by the vehicle could potentially harm its sensors and cameras. Accessing repair procedures is paramount to ensuring that vehicles are restored to safe operating conditions when replacing ADAS components or when other vehicle components are serviced or replaced.
By following the defined OEM procedures, technicians can have confidence that faults are accurately diagnosed, and repairs are conducted accurately and verified after the repair, safeguarding the functionality and reliability of ADAS components.
Conclusion:
In conclusion, achieving perfect ADAS calibration requires a meticulous approach, involving both specialised skills and the appropriate equipment which adheres to OEM procedures.
This is essential to ensure accurate ADAS calibration in line with OEM specifications.
By embracing ADAS technology and mastering the calibration process, independent garages have the opportunity to set themselves apart in the industry as specialists, to offer customers a precise and reliable service that ensures optimal performance and safety on the road.
Here are some more articles we thought you might like!

In this article, we explore the remarkable journey of ADAS technology and its pivotal role in enhancing road safety and the opportunity it presents for independent garages and bodyshops’ considering investing in their own ADAS equipment.

Wheel alignment plays a pivotal role in automotive maintenance and safety. Check out our essential guide to understand the advantages of wheel alignment checks. Increase productivity and potentially boost revenue, every single day.
©2025 Snap-on Incorporated. All rights reserved.